My friend and talented colleague, Ryan Leung, wrote this guest tutorial on deploying to Digital Ocean with an Ubuntu and PostgreSQL setup. The following step-by-step guide is from Ryan…
Deployment with Ubuntu and PostgreSQL on Digital Ocean
By Ryan Leung
Recently, I had to deploy a project that used PostgreSQL as it’s database layer. After considering my hosting options I settled on Digital Ocean for it’s ease of use and community support. Check out their community portal for a variety of well written tutorials.
In this post, I will walk through setting up an Ubuntu droplet on Digital Ocean, and installing PostgreSQL on the server.
First, create a droplet that will house your Ubuntu and PostgreSQL instance on Digital Ocean. Digital Ocean makes this really easy — select the settings you need for your server and click create droplet.
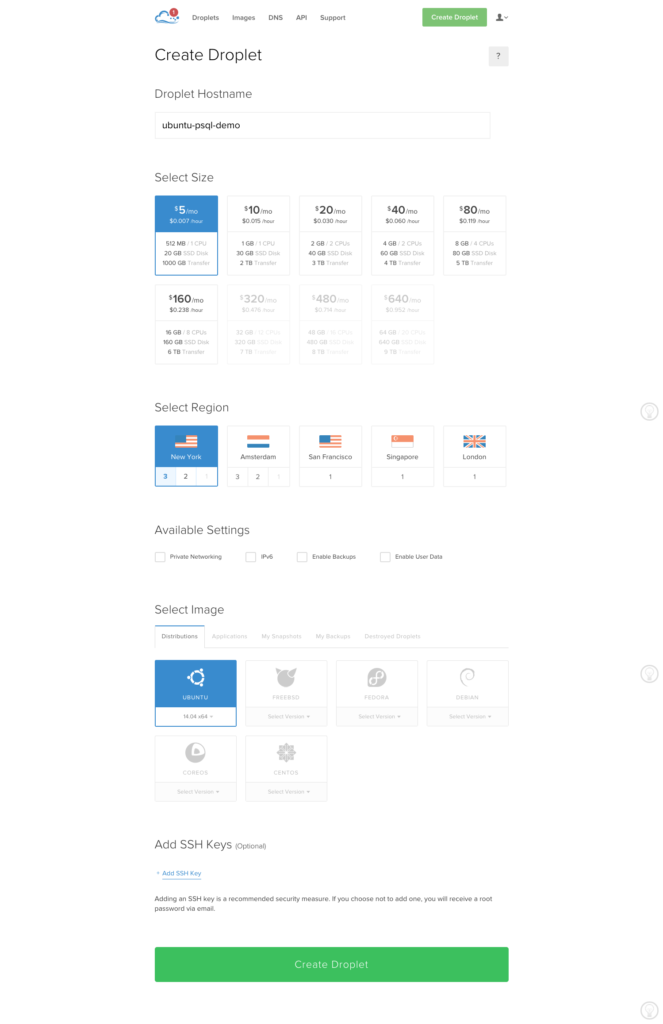 Make sure to select version 14.04 of Ubuntu — at the time of writing, Ubuntu 14.10 is also available.
We will use the default root username and password sent by Digital Ocean to your email to access the new Ubuntu VM. If you’re creating a VM for production/deployment, it’s a good idea to setup SSH authentication. Instructions to do this can be found in this community tutorial.
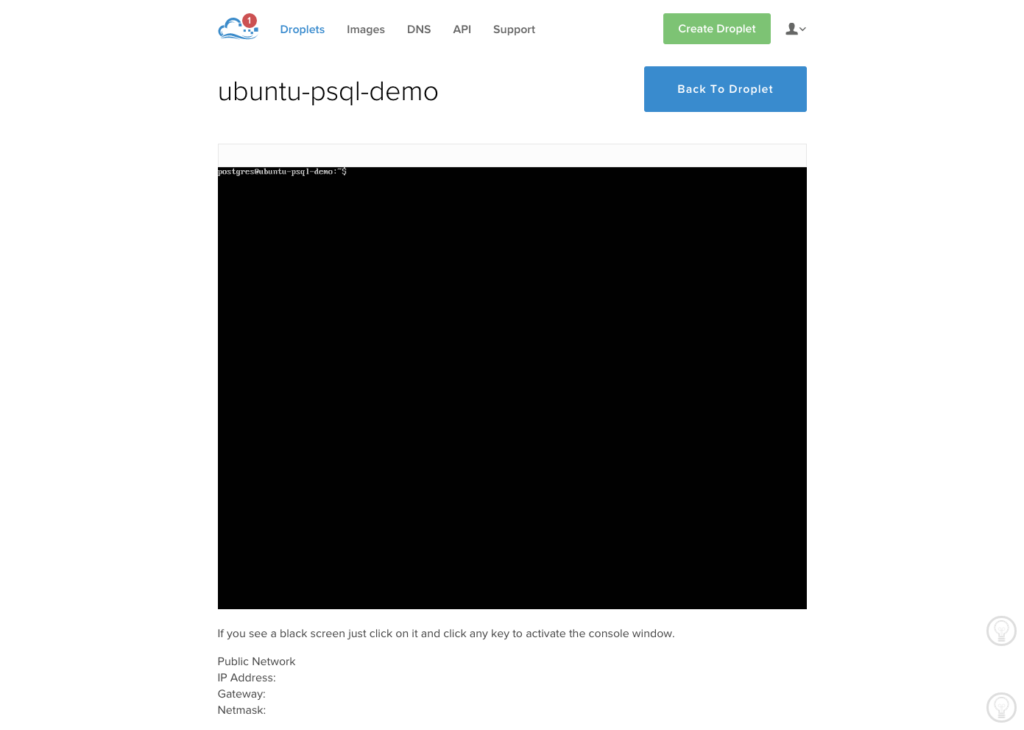
Once the setup process is completed, connect to your Ubuntu droplet using the root password that was sent to your email. There are several ways you can do this, in this tutorial we will use the in-browser console provided by Digital Ocean. From your droplet dashboard, click Access followed by Console Access, which should bring you to the following screen:
If you would rather connect using your operating system’s command-line interface, take a moment to note down the ip address of your droplet. It is located just below the name of your droplet on the dashboard.
At this point, follow the steps below to connect via SSH (source)..
Mac Users
Mac users can use the pre-installed ssh client that comes with osx, just run the following command:
Windows Users
Windows users will have to install an ssh client — PuTTY is one that is commonly used and can be found here.
- Download and install PuTTY
- Fill in the ‘Host Name (or IP address)’ field using your ip address
- Set port number to 22
- Set connection type to SSH
- Click on the SSH entry in the sidebar, and select 2 Only
- Click Connect
Logging into the Server
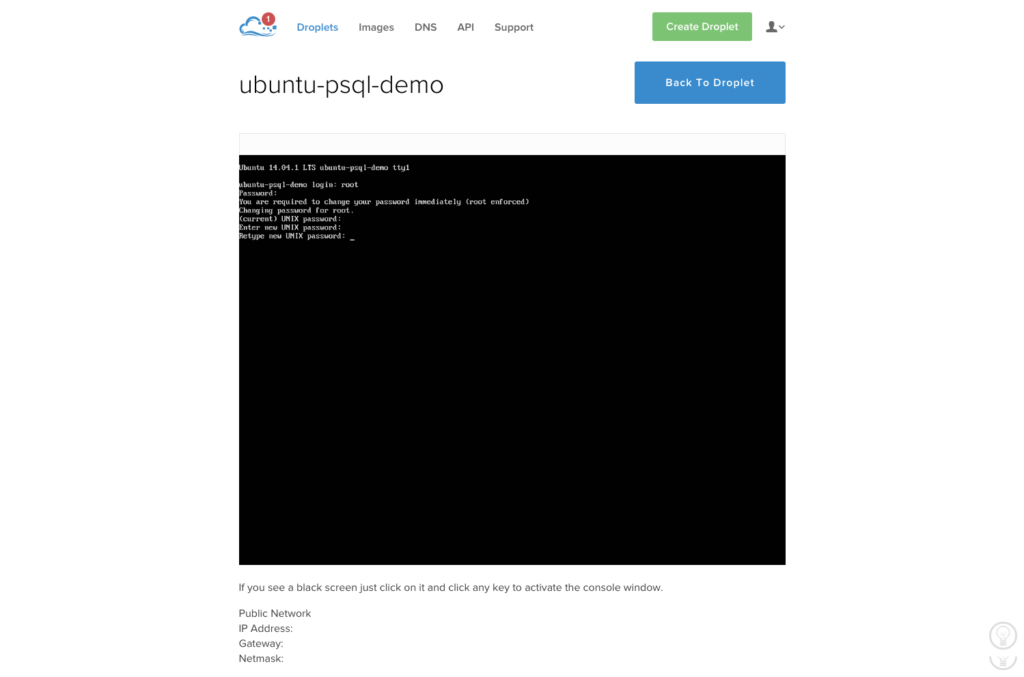
The first time you login the server will prompt you to change your password:
Installing PostgreSQL
By default, Ubuntu’s package manager APT contains PostgreSQL packages, so installation should be a snap. Run the following commands:
Note: Postgresql-contrib contains useful tools that are not considered part of the core PostgreSQL functionality. Postgis adds spatial and geographical capabilities to Postgres, letting you run locational queries on your database.
Switch to PostgreSQL User and Run PostgreSQL
Postgres uses ‘roles’ to define access privileges. After installation, it will create a new user account on your Ubuntu machine named postgres. It will have all access privileges to your PostgreSQL database. Run the following commands to switch to the new user and run the PostgreSQL CLI.
Congratulations! You’ve just setup your Ubuntu droplet on Digital Ocean, and installed PostgreSQL 9.3. From here, you can get started creating your database through the CLI. If you’re new to PostgreSQL, the official documentation’s tutorial is a good place to start.